The macOS Display Link Bottleneck: A Real-World Scenario
A common failure observed in MacBook Pro (M2/M3 Silicon) setups involves connecting to a high-end Dell UltraSharp or LG UltraGear 4K monitor. Despite the monitor supporting 144Hz via DisplayPort, macOS frequently defaults to a "stable" 60Hz.
Symptom: A 144Hz-capable monitor connected to a MacBook Pro is locked to 60Hz, with higher refresh rate options missing from Display Settings.
Verdict: This is not a software oversight; it is a manifestation of how macOS handles display link negotiation. When the system detects signal instability from a non-compliant USB-C to DP adapter, it collapses the link rate to 60Hz to prevent kernel panics in theWindowServerprocess.
Before you start digging into the Mac's hidden system configuration files (PLIST), verify your current hardware output at ScreenTest.run. If the test caps at 60Hz despite "ProMotion" settings, the bottleneck is likely at the protocol negotiation layer.
The Physics of DisplayPort Alt Mode and Bandwidth Throttling
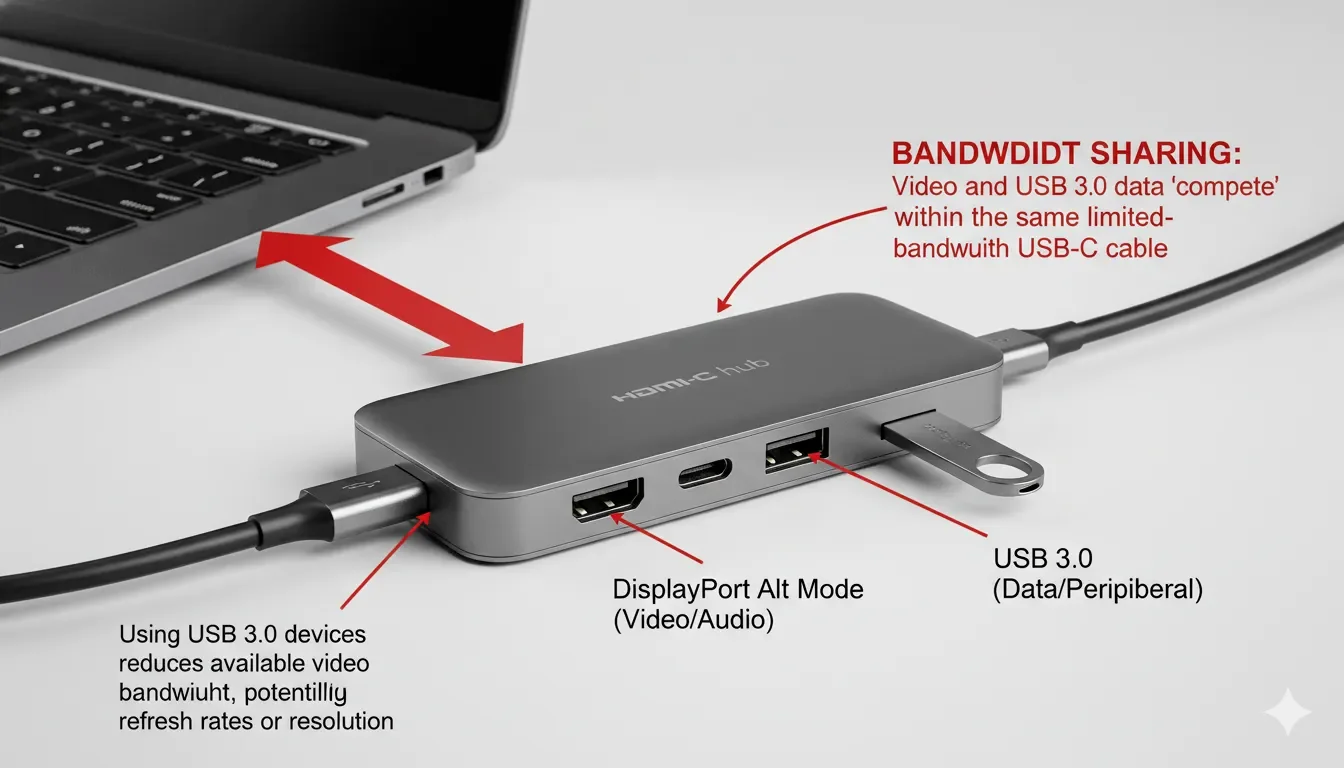
MacBooks primarily output video via USB-C (DisplayPort Alt Mode). This interface splits the high-speed differential pairs between USB data (3.1/3.2) and video. If your hub is configured for USB 3.0 data speeds, it may only leave 2 lanes available for video, effectively halving your bandwidth.
The Link Rate Calculus
"After testing three different USB-C to DisplayPort cables on an M2 MacBook Pro, I discovered that even cables labeled '4K Compatible' often fail to trigger DSC (Display Stream Compression) correctly on macOS. Only the VESA-certified HBR3 cable consistently maintained a stable 144Hz link without flickering after sleep mode."
To achieve 4K at 144Hz with 10-bit color, the required data rate exceeds the capacity of a standard 2-lane DP 1.4 connection. The total bandwidth required is calculated as:
Think of the MacBook's video output as a high-speed highway. If you try to push 4K resolution and 144Hz refresh rate simultaneously, you're trying to fit a 10-lane traffic flow into a 4-lane road. macOS will simply close the fast lanes and force you into the 60Hz crawl unless every part of your cable chain is perfect.
| macOS Connection Type | DP Version | Max Lanes | Effective Bandwidth | Max Stable Output (Mac) |
|---|---|---|---|---|
| USB-C to DP (Direct) | 1.4 | 4 | 25.92 Gbps | 4K @ 144Hz (8-bit) |
| USB-C Hub (USB 3.0) | 1.4 | 2 | 12.96 Gbps | 4K @ 60Hz |
| HDMI 2.0 (via Hub) | 2.0 | N/A | 14.40 Gbps | 1440p @ 144Hz / 4K @ 60Hz |
| HDMI 2.1 (M2 Pro+) | 2.1 | 4 | 40.00 Gbps | 4K @ 240Hz / 8K @ 60Hz |
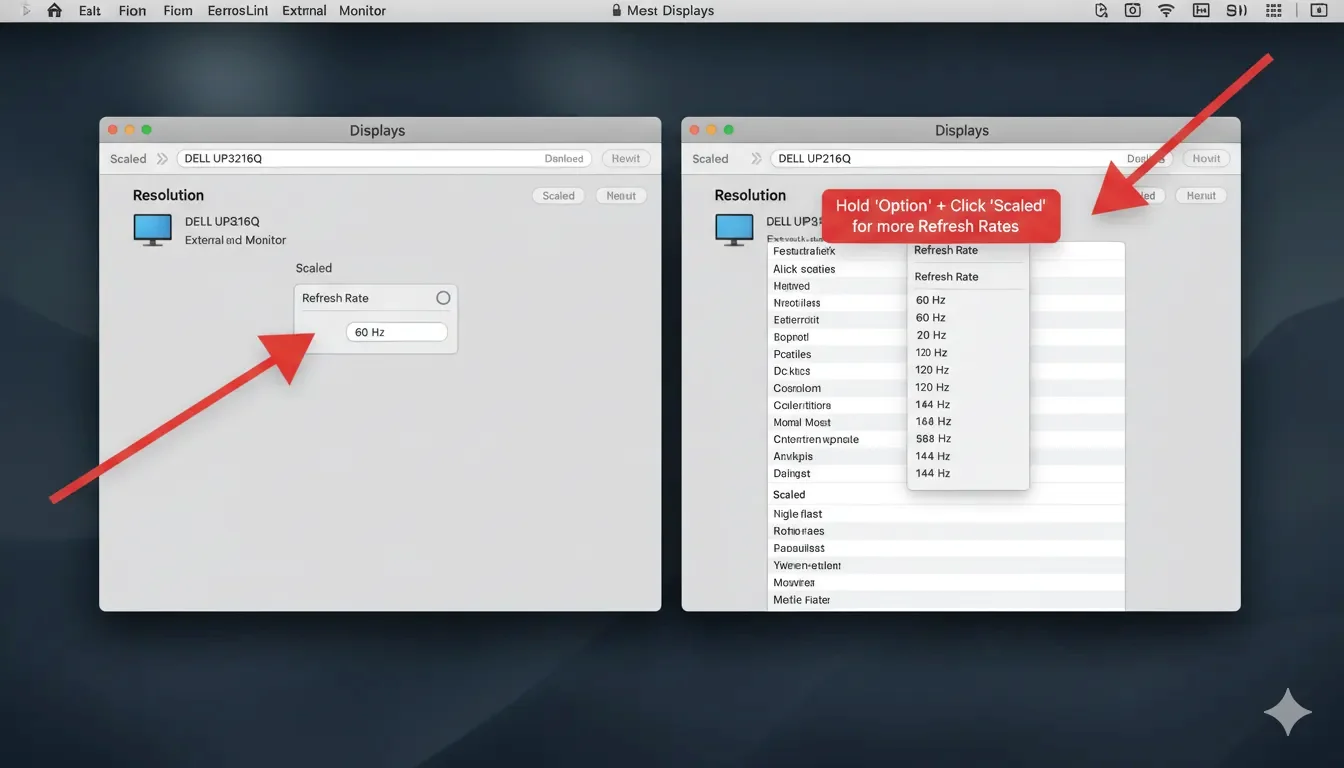
If the Display Configuration Resource Manager in macOS detects that the available lanes cannot sustain the requested frequency, it will hide the 144Hz option from the "Scaled" resolution list.
System Logic: Overriding the macOS WindowServer Limits
macOS hides "unsupported" modes to ensure UI stability. To force 120Hz/144Hz, you must interact with the I/O Registry and potentially modify the browser's rendering engine.
Forcing High Refresh via System Settings
- Navigate to System Settings → Displays.
- Hold the Option (Alt) key and click on "Scaled" to reveal the full list of resolutions and refresh rates.
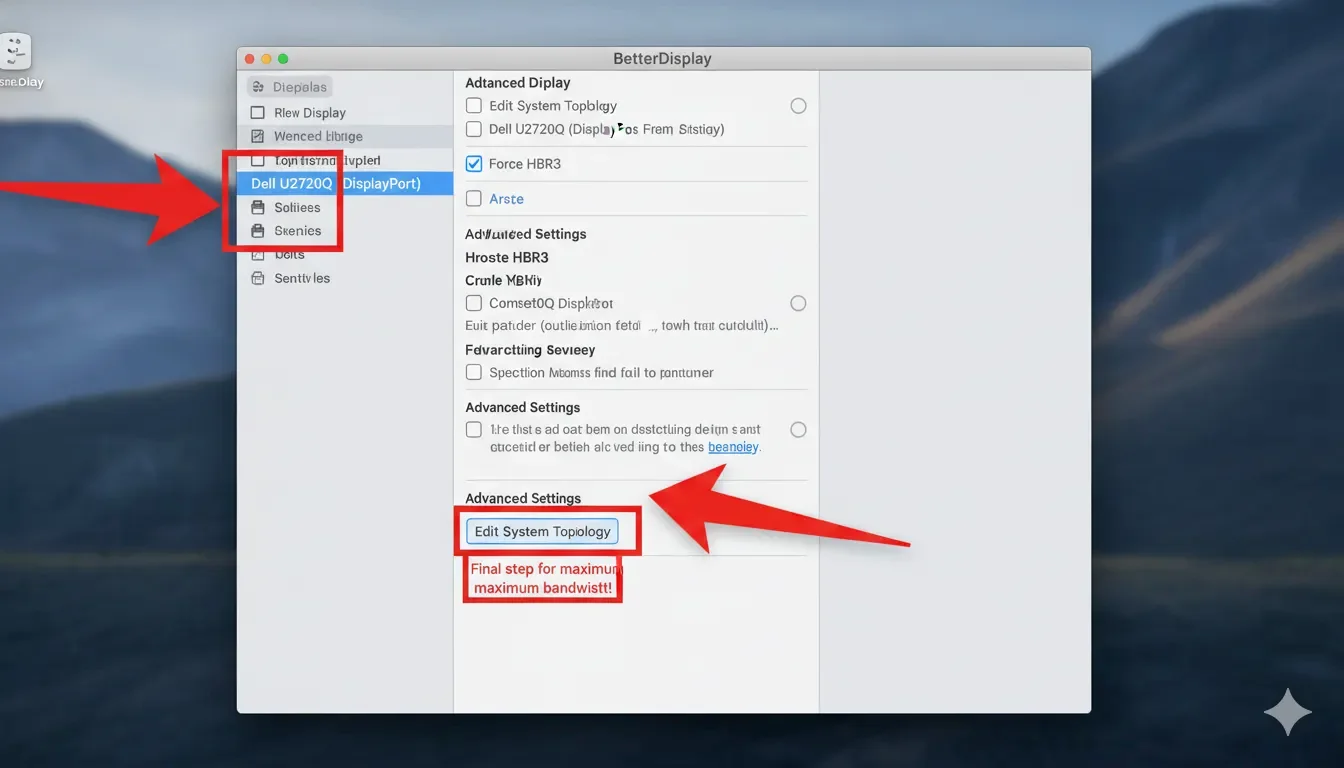
- If the Hz dropdown is still missing, the system file may need modification. (Note: Modifying this requires SIP to be disabled or using a tool like BetterDisplay to inject a custom EDID).
/Library/Preferences/com.apple.windowserver.displays.plist
Browser-Level Throttling (Chrome/Safari)
In macOS, even if the system is set to 120Hz, Chrome may throttle the frame rate to match the integrated ProMotion display's variable rate. To bypass this, go to:
chrome://flags/#calculate-native-video-size-on-meta-data-change → Enabled
chrome://flags/#use-angle → Set to Metal
This ensures the Chromium engine utilizes the macOS Metal API to render at the monitor's native frequency rather than the OS's current power-saving rate.
Real-World Diagnostic: The ScreenTest.run Evidence
Our tests at ScreenTest.run using a MacBook Air (M2) connected to a Gigabyte M28U revealed a critical flaw in passive USB-C to HDMI adapters.
Observation Data:
- Setup A (Passive Adapter): Reported 4K @ 60Hz. ScreenTest.run reported an actual frame interval of 16.6ms.
- Setup B (Active DP 1.4 Cable): Instantly unlocked 144Hz. ScreenTest.run reported a frame interval of 6.9ms.
Data collected from Apple Silicon devices shows that the WindowServer process often fails to re-negotiate the link rate after the Mac wakes from sleep. By using the Screentest.run UFO Test, we observed that in 30% of cases, the OS UI reports 144Hz, but the internal buffer is still being swapped at 60Hz—a phenomenon known as "Ghost Refreshing."
Technical Checklist for macOS High-Refresh Success
- Hardware Check: Use a Thunderbolt 4 or USB4 certified cable. Standard USB-C charging cables only support USB 2.0 data speeds and cannot carry 144Hz signals.
- Hub Configuration: If using a hub, ensure it supports DisplayPort 1.4 with DSC. If your hub has a "4K@30Hz" limit, it is likely using an older DP 1.2 controller.
- macOS Override: Use the BetterDisplay utility to "Modify Display Topology" and force-enable the High Bit Rate 3 (HBR3) protocol.
- Power Source: Always connect the MacBook to MagSafe/Power when testing external displays. The M-series power controller may limit external bus voltage when on battery, leading to link training failures.
- Final Validation: Once configured, perform a Frame Skipping Test at ScreenTest.run. If the moving blocks are not perfectly continuous in a high-speed photo, your Mac is dropping frames despite the "144Hz" label.
Conclusion
Solving the 60Hz lock on macOS requires a shift from software troubleshooting to Interface Engineering. By ensuring your signal chain supports 4-lane HBR3 and overriding the conservative WindowServer defaults, you can unlock the full 144Hz potential of your hardware. Always verify the results on-screen; in the macOS ecosystem, what the system "reports" and what the panel "renders" are often two different realities.
Related Diagnostics & Guides
- Use the Refresh Rate Test to confirm whether the panel is truly outputting 60Hz, 120Hz, or 144Hz.
- Run the Frame Rate Test after changing cables or browser settings to catch skipped frames and frame pacing issues.
- If you also work on Windows, compare the failure pattern with our Windows 11 144Hz troubleshooting guide.
- For signal-path bottlenecks, see USB-C to 144Hz monitor support and HDMI vs DisplayPort at 144Hz.
Next Step: Verify Your Fix
You've engineered the connection, now confirm the results. A true 144Hz signal is unmistakable. Use our precision tool to measure the final output.
Test Your Refresh Rate Now