Inspect a new monitor as soon as it arrives. The goal is not to panic over tiny normal variation; it is to find obvious defects while the return window is simple. Work through pixels, backlight, uniformity, ports, and refresh rate in a calm, repeatable order.
Start with the Dead Pixel Test, then move through black, white, grey, and color screens.
Step 1: Check the Exterior and Setup
Before powering on, inspect the panel surface, bezel, stand, and ports. Look for shipping damage, pressure marks, scratches, and loose connectors. Then connect the monitor directly to the computer with the best cable included or a known good cable.
Let the monitor warm up for 20 to 30 minutes before judging brightness and uniformity. Pixel checks can happen immediately, but some backlight behavior changes slightly as the panel warms.
Step 2: Run Solid Color Pixel Tests
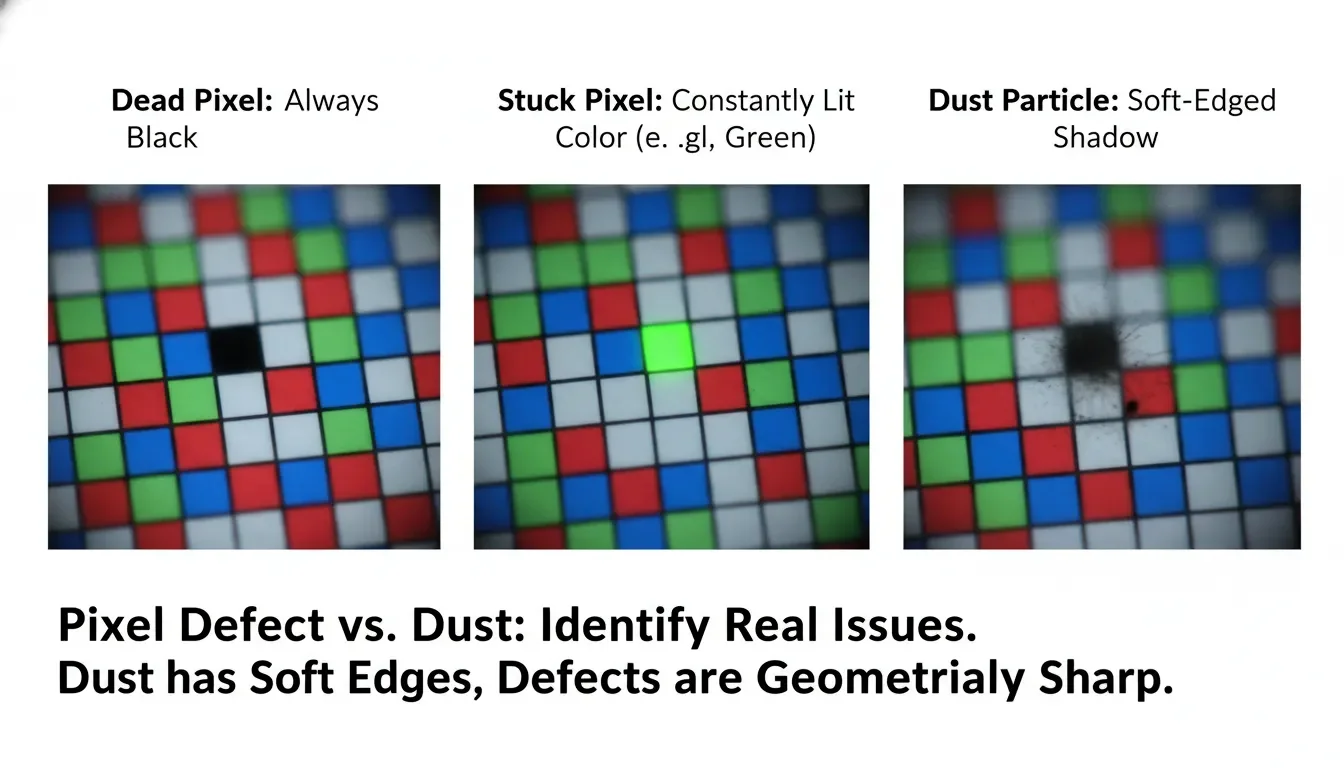
Cycle through white, black, red, green, and blue. A dark pixel is easiest to see on white. A bright stuck pixel is easiest to see on black. Red, green, and blue screens help you spot sub-pixel problems that a single white screen may hide.
| Screen | Finds | What to do |
|---|---|---|
| White | Dead pixels, dust, dirt | Clean gently and retest |
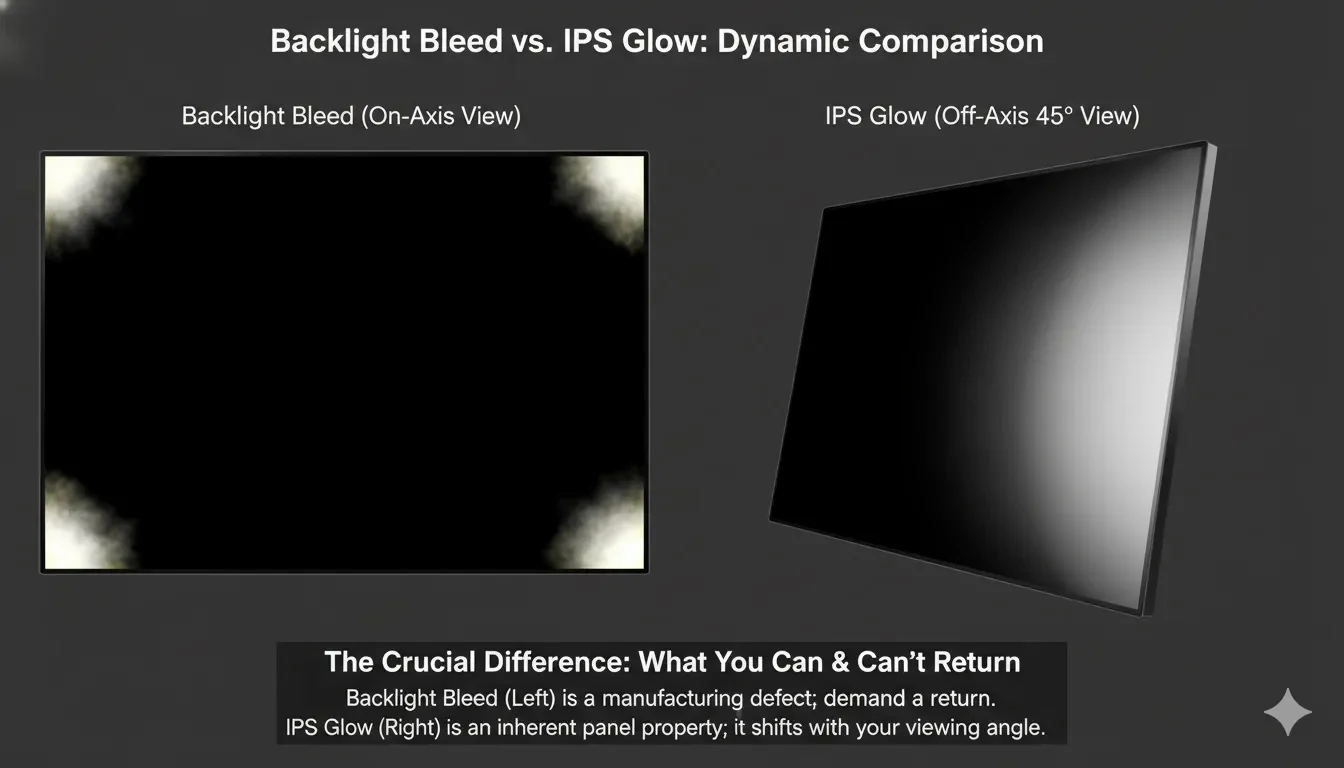
| Black | Bright stuck pixels, bleed, glow | Check whether light patches are fixed |
| Red / Green / Blue | Sub-pixel defects | Record exact color and location |
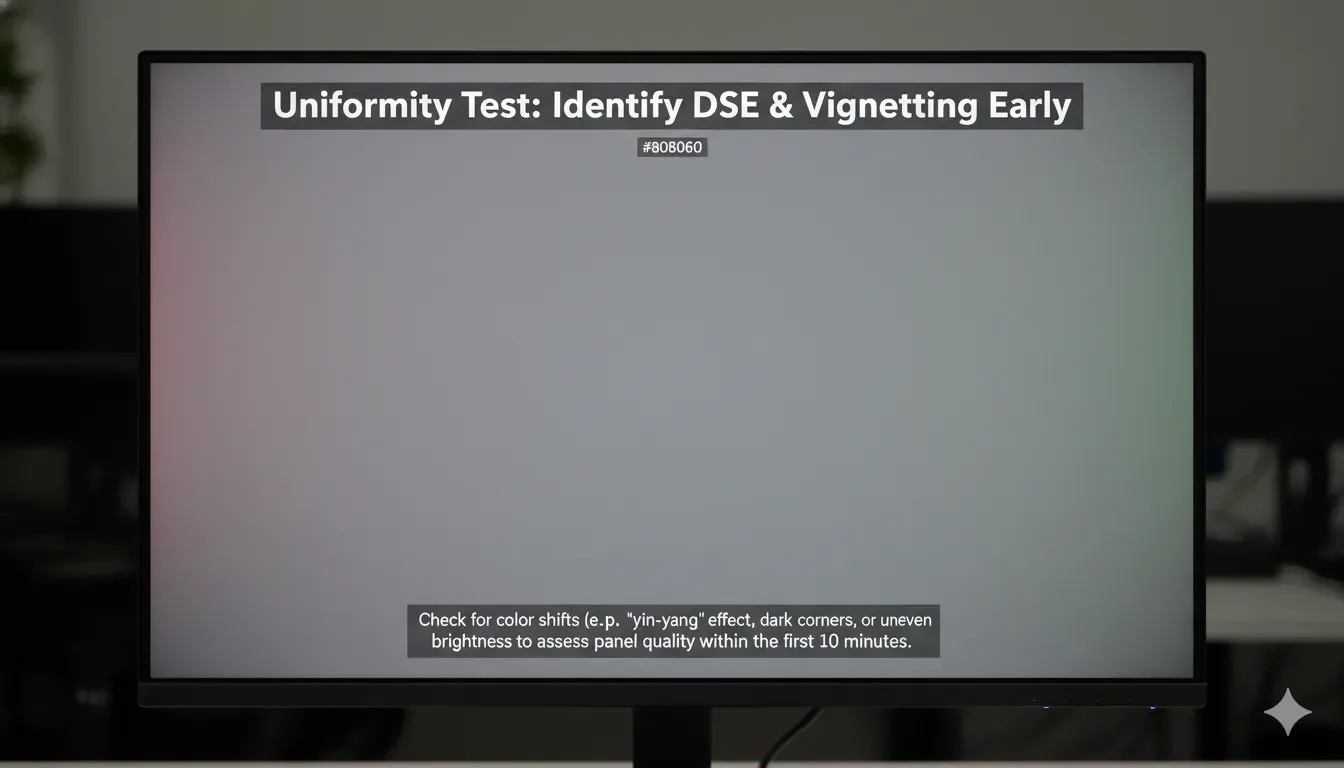
| Grey | Dirty screen effect and tint | Compare center, corners, and edges |
Step 3: Check Bleed, Glow, and Uniformity
Use the black screen in a dim room at realistic brightness. Move your head slightly to distinguish IPS glow from fixed backlight bleed. Then use grey and white screens to check broad uniformity, tint, and dirty patches.
Do not judge only from a long-exposure phone photo. Your eyes at normal distance matter more than a camera trying to brighten a black screen.
Step 4: Check Refresh Rate and Inputs
Set the advertised refresh rate in the OS, then run the Refresh Rate Test. If the monitor is sold as 144Hz, 165Hz, or higher, confirm that the option appears at your intended resolution and cable path.
Try the ports you plan to use daily. A monitor can look fine on one input and fail to expose the right mode on another.
How to Think About Pixel Policies
Pixel policies vary by seller, brand, region, and model line. Some brands treat bright pixels differently from dark pixels, and premium lines may have stricter policies. Do not rely on generic forum rules. Check the seller return window and the manufacturer policy for your exact model.
If you find a defect, take clear photos, note the date, and record which solid color reveals it. Keep the language factual: location, color, size, and whether it appears on every test screen.
Conclusion
A good new monitor inspection takes about 10 minutes after setup. Check pixels, bleed, uniformity, ports, and refresh rate while return support is still easy. Keep the evidence simple and factual.
FAQ
What is the best color to find dead pixels?
White usually reveals dark dead pixels best. Black reveals bright stuck pixels. Red, green, and blue help identify sub-pixel issues.
Should I return a monitor for one bad pixel?
That depends on the seller return window, brand policy, defect type, location, and how much it affects your use. Check the exact policy for your model.
How soon should I test a new monitor?
Test it on the first day if possible, so you can use the simplest return or exchange process if a clear defect appears.
Related Tests and Guides
Start the Inspection
Use solid color screens to check a new monitor before the return window gets complicated.
Run the Dead Pixel Test